Showing posts with label Happy Go Lucky. Show all posts

Saturday, 26 April 2014

Abstract Nails with Tutorial!

Hey guys! Last night I was trying to figure out what to do on my nails. I went though the possibility of doing my favourite bags design (which I will probably do later on) or things people have asked me to do, but I wasn't feeling it I guess. Then I reverted to google searching art to give me inspiration. I decided I wanted to do a mixture of circles and prime colours (kinda a circle version of Piet Mondrian's compositions). 


I really like them, but I a little bit regretting my decision on my index finger to colour red down the middle, in hindsight I think I probably should have kept it the neutral colour, but oh well... its a little different.
I also decided to take photos as I was painting my nails so I have a full tutorial with photos instead of my little drawings! Though I did forget to take a photo of just the base colour... oops. 


Okay, so what I didn't take a picture of is how my nails started with 2 coats of a neutral colour. I will list all the polishes I used down below.
  1. Paint curved lines and circles with a thin striping brush and black polish. I did these pretty randomly, but I found it looked better when there weren't too many lines (I think i may have gotten a little carries away with my index finger...
  2. Start colouring in the sections that you have made. I liked to keep the long sections in the middle neutral and fill out the more circular sections.
  3. Continue filling out the sections until you think it looks good. You could have put more colours in here instead of repeating colours, I was just scared that I would choose the wrong colours and screw it up...
  4. Go over the black lines again so they are more solid and even
  5. Clean up all the excess polish on your fingers
  6. After you let them dry, go over in your favourite top coat!
I tend to clean up before I put my top coat on... I don't know if this is normal, but I find it easier and it also makes it quicker for me, but you can do it whenever!

The polishes I used were:

OPI My Vampire is Buff (Neutral)
China Glaze High Hopes (red)

China Glaze Liquid Leather (black)
China Glaze Man Hunt (blue)
China Glaze Happy Go Lucky (yellow)

See you guys next time!

Sunday, 13 April 2014

Easter Nails

Hey Guys, its rainy and gross today, so I decided to do some happy nails! Its Easter soon, which is super exciting, who doesn't love chocolate right?! So I decided to do a set of themed nails. As you might be able to see, I have been enjoying doing small repeating patterns, so I tried to do my Easter nails with the same sort of idea.


Also, I hope you like my socks. My friend bought them for me as she doesn't think I eat enough vegetables, so these help right? :-P
For these nails I started with a white base and added the details with a dotting tool and a very thin striper.
The polishes I used were:

Base:


China glaze snow and China glaze white on white (white)
Chicks:
China glaze happy go lucky (bright yellow)
OPI atomic orange (Orange)
China glaze liquid leather (Black)
Eggs:
China glaze lemon fizz (light yellow)
China glaze peachy keen (light orange/peach)
China glaze re-fresh mint (mint green)
China glaze kinetic candy (light blue)
China glaze sweet hook (light purple)


I have also included some photos of Easter nails I did last year. Sorry for the quality of the photos.. I clearly hadn't heard of sun before. 
The first set of Easter nails are just a mash up of a bunch of designs I had seen around the internet. I did have major troubles with the chevrons though, and still I am never very confident doing them, but maybe I will experiment a little more now with them and try to improve!


These second nails are my version of Chalkboard Nails' Easter Mix-up. These were a cool, fun and bright take on the usually pastel Easter nails, and were so fun to wear!


Hope you guys have a great Easter, and I would love to see any cool Easter inspired designs you have tried! :)

Saturday, 12 April 2014

Pineapple Nails and pictorial

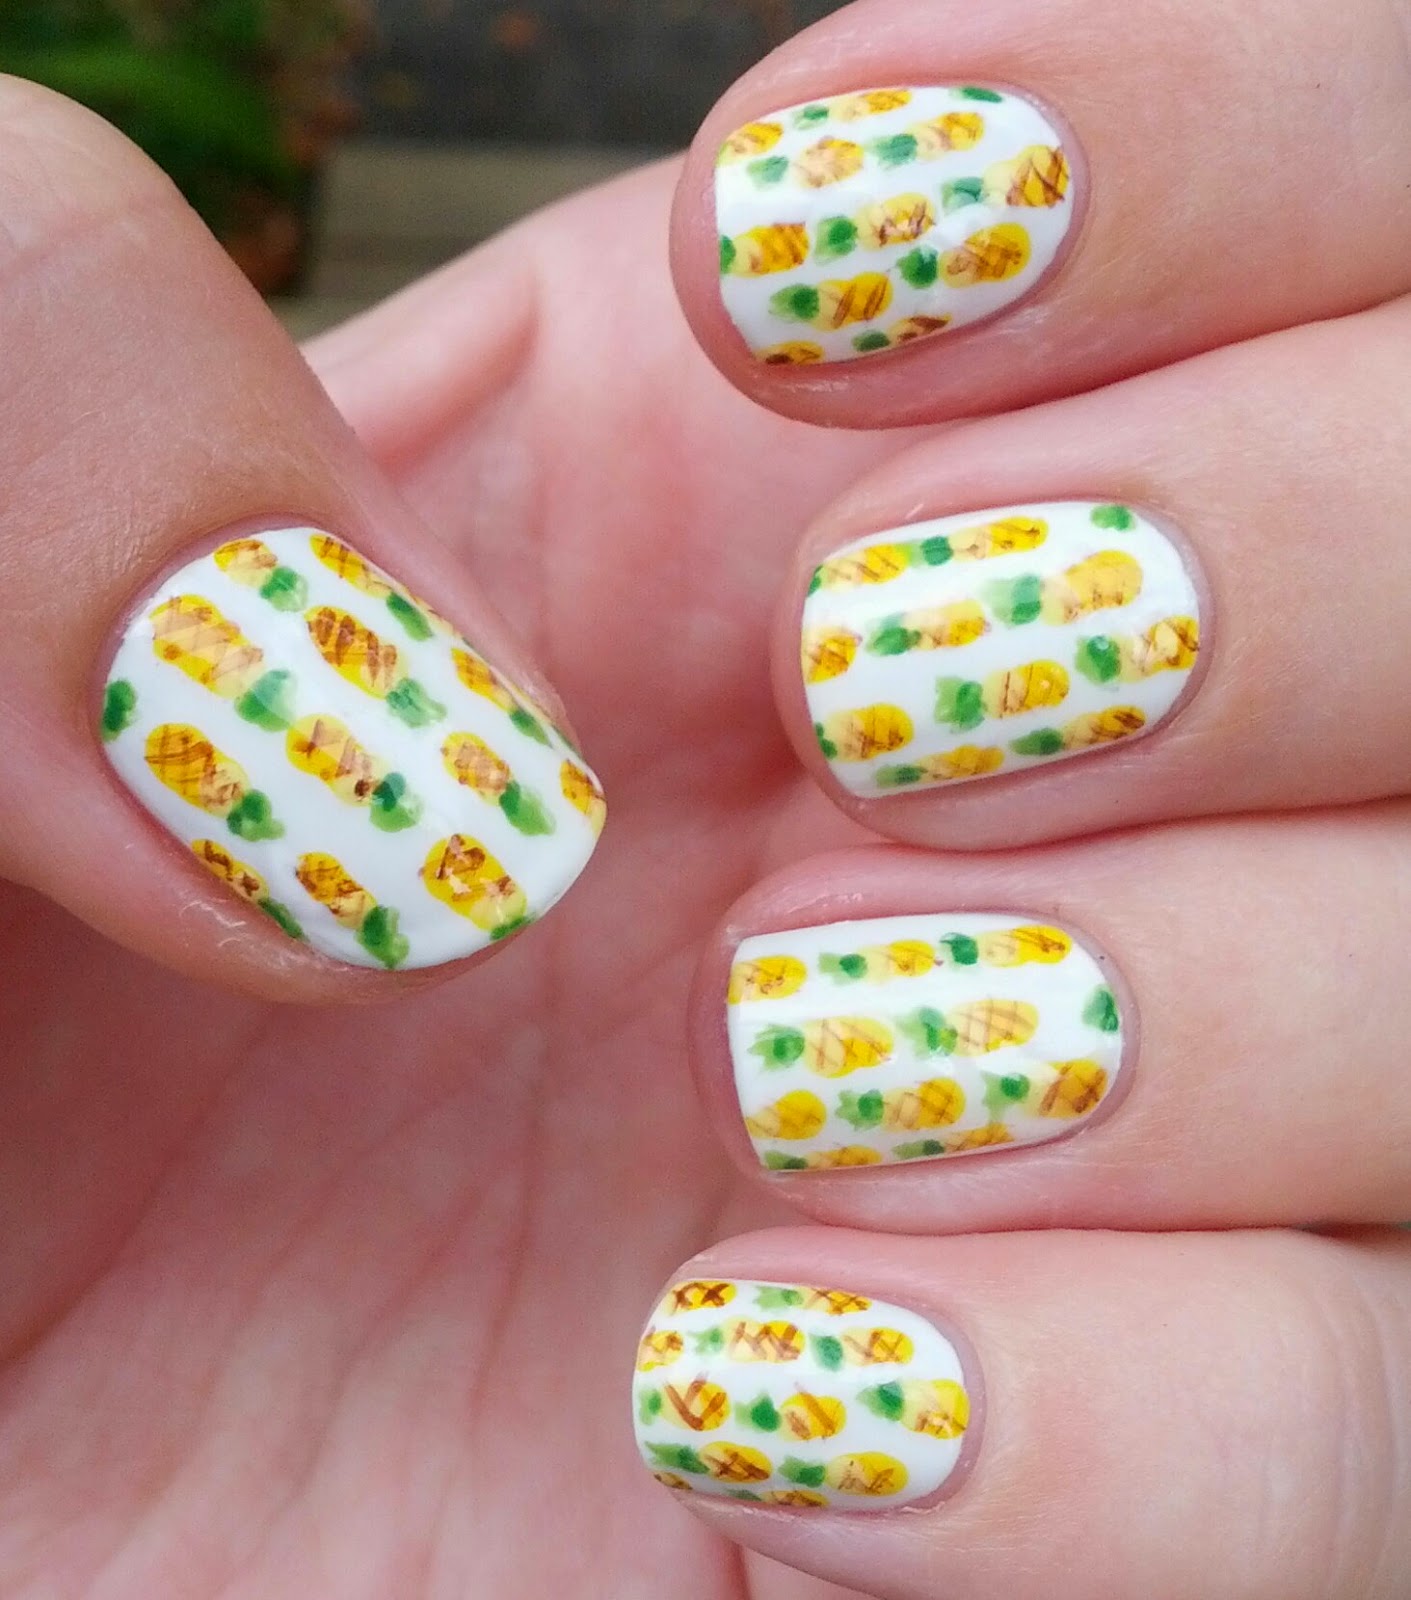
Hey guys, today I am going to show you a set of nails I did a couple of months ago. These are some of my favourite nails I did over the summer. I have always liked the look of a small repeated pattern, and due to all the fresh fruit around I decided to do a pineapple pattern!

Left Hand


Right Hand
My right hand, as you can see, was considerably less detailed than my left, mainly due to laziness. Being right handed, it becomes very time consuming to do such detailed designs on my right hand as well, so sometimes I cut corners and do a simpler, related design on my right hand.
I have made another pictorial for this design to show you guys how I did this nail art. 


The polishes I used were 
China Glaze Snow (white)
China Glaze Lemon Fizz (light yellow)
China Glaze Happy Go Lucky (yellow)
China Glaze Gaga For Green (green)
China Glaze StarBoard (dark green)

I also used a medium sized dotting tool and a striping brush

Hope you guys like them!